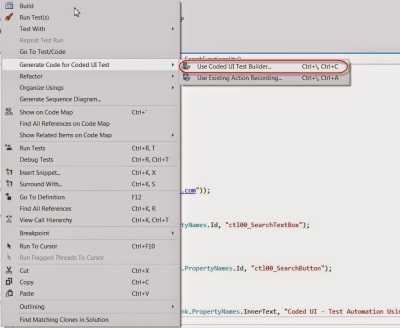
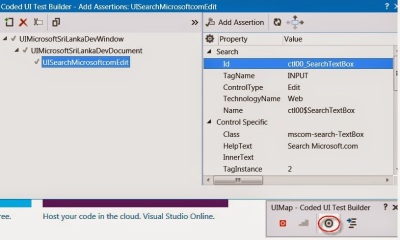
Most popular way of using CodedUI is recording the test cases steps and generating the code automatically. Let’s look at the advantages and drawbacks of Record and Playback feature
Advantages:
1. Easy
2. Required less time
3. No need much coding knowledge
4. Generates an optimized code
Disadvantages:
1. Even very simple tests generate a lot of code.
2. The UIMap is big and clunky and there currently is no editor or documentation for it. So if you want to make some changes, things can get complicated unless you want to re-record an entire test step.
3. Tests record and run quite a bit slower
4. Difficult to maintain project class structure
5. Tests fails to handle some of the custom controls
Due to above reasons and mainly to create a maintainable and reusable tests most technical QAs use CodedUI hand coding rather than recording the tests. It might be time consuming comparing to record and playback but it is a handy solution for long term test runs.
Let’s get started:
1. Open Microsoft Visual Studio 2012 Premium or Ultimate, click New Project > Test > CodedUI Test Project
2. In the Generate Code for Coded UI Test dialog, click Cancel
3. Add “Microsoft.VisualStudio.TestTools.UITesting.HtmlControls” reference to the header of the test class
4. Now everything is set for start coding. Let’s look at a simple example with following steps
- Open and go to “http://www.microsoft.com” page in IE browser
- Search for ‘Coded UI’ in Microsoft web site search box
- Verify result page has ‘Coded UI – Test Automation Using Visual Studio 2010 Coded UI’ link
- Open the above link
finally you can set the text of the HtmlEdit ‘SearchBox” as the text that you need to enter to the textbox.
Then for clicking the Search Button you can perform same action to find the control then click on the control as below
//Click Search Button
HtmlButton SearchButton = new HtmlButton(browserWindow);
SearchButton.SearchProperties.Add(HtmlButton.PropertyNames.TagName, “INPUT”, HtmlButton.PropertyNames.Id, “ctl00_SearchButton”);
Mouse.Click(SearchButton);
Same logic applies to the other controls such as Hyperlinks, FileInputs, ComboBoxes. Likewise you can perform the Assert property of a control and click on the control as below
//Verify page has ‘Coded UI – Test Automation Using Visual Studio 2010 Coded UI’
HtmlHyperlink ExpectedLink = new HtmlHyperlink(browserWindow);
ExpectedLink.SearchProperties.Add(HtmlHyperlink.PropertyNames.TagName, “A”, HtmlHyperlink.PropertyNames.InnerText, “Coded UI – Test Automation Using Visual Studio 2010 Coded UI”);
Assert.AreEqual(true, ExpectedLink.Exists);
Mouse.Click(ExpectedLink);
5. After completing the code build and execute test by right clicking inside the Test Method and choosing Run Tests option.


